ID Photo Maker - Save your money, Save your time!
Product Screenshot Purchase Contact
Help Topic
 - Step 1: Cropping Picture -
Add/Delete Picture
Crop Picture
Delete Photo

- Step 2: Photo Adjust -
Edit
Photo Adjust

- Step 3: Output -
Layout
Output

 ID Photo Maker - Crop Picture

Select Crop Size


"Crop Size" Area

ID Photo Maker include 25+ countries/regions ID photo size styles. you can in "Crop Size" Area to select the crop size

Rotate Picture


"Rotate Picture" Area

This function can help you to make sure you selected picture is in right rotation. you can modify it using "Rotate 270" and "Rotate 90".

Start Cropping


When you selected picture and crop size, finish adjust the angle, then you can start to crop. Click "Start" button to start.

Cropping Operation

ID Photo Maker have two cropping mode to adapt to different size standard

1.Four step cropping mode:
(Through the select eyes, chin, crown position to define the selection area)


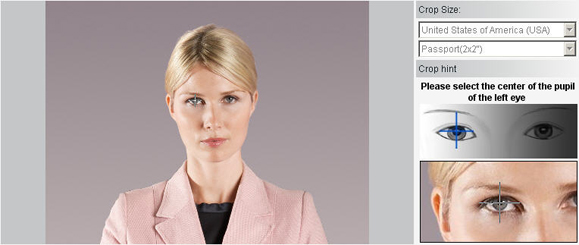
Select the left eye position.


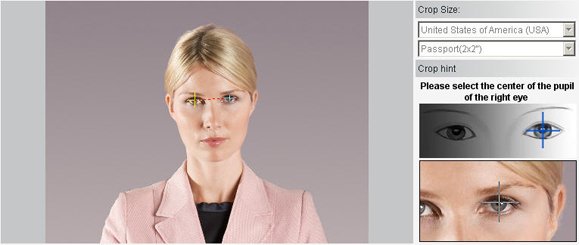
Select the right eye position


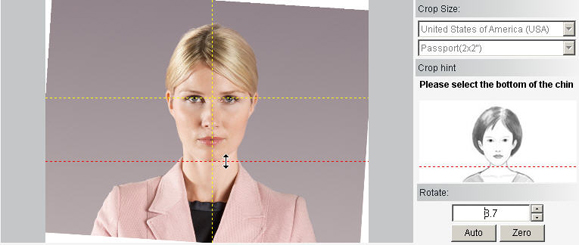
Select the chin position

after you selected eyes position, application will automatically rotate the picture to make sure eyes are in the same straight.
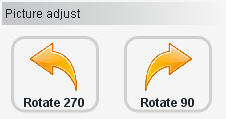
of course you also can rotate the angle manually (in "Rotate" you can set up the rotate angle ) or automatically(using "Auto" button) or set angle to 0(using "Zero" button).


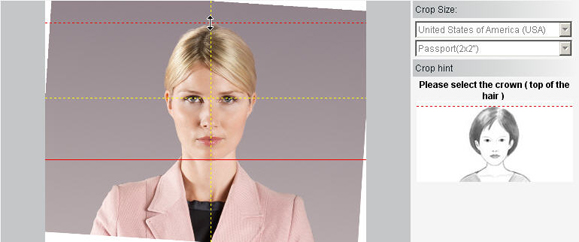
Select the crown position

2.Six step cropping mode:
(Through the select eyes, chin, crown, left side of the face, right side of the face position to define the selection area)
(The eyes, chin, crown select step are same as the "four step mode")


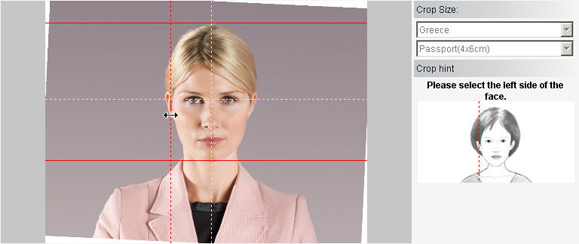
Select the left side of the face position


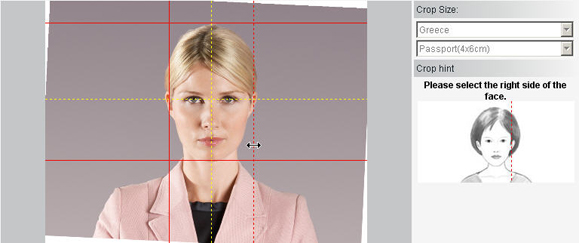
Select the right side of the face position

Confirm Cropping


Up, Down, Left, Right: fine tune the selection position
Crop: Confirm cropping and add the processed photo to the photo list below.

 ID Photo Maker Home Page
Online Help Topic
Copyright © IDPhotoMaker.com